 Save
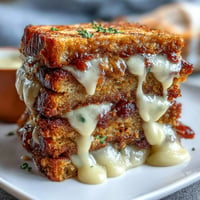
Save My aunt brought these to a Derby party years ago, and I watched them disappear faster than the horses crossed the finish line. She had this knowing smile whenever someone asked for the recipe, like she was guarding a secret that made her the most popular person in the room. The first time I made them myself, I was surprised by how simple they were to pull together, yet how they managed to taste like something you'd find at the fanciest tea service. Now whenever I'm asked to bring something to a gathering, these finger sandwiches are my go-to move.
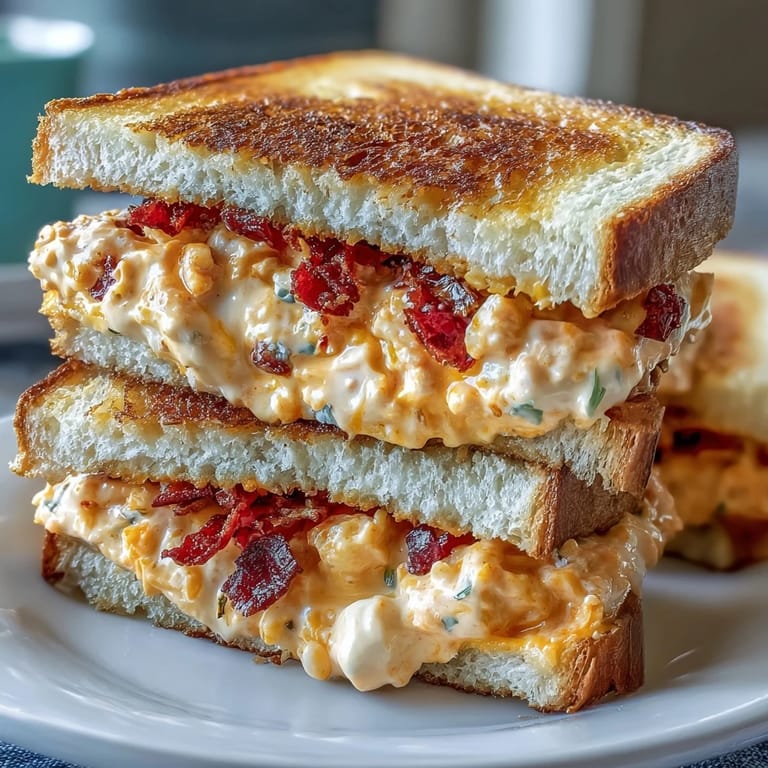
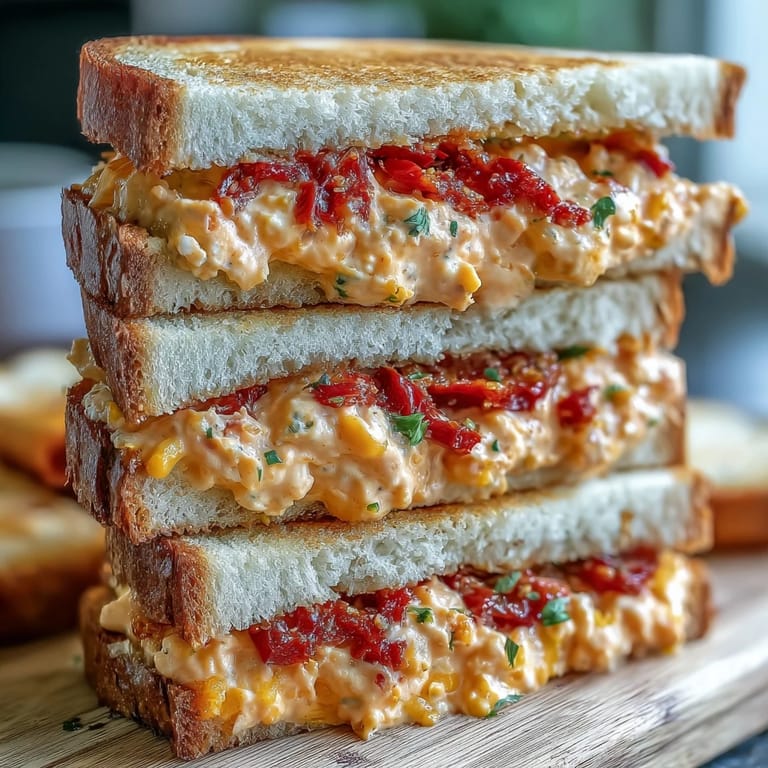
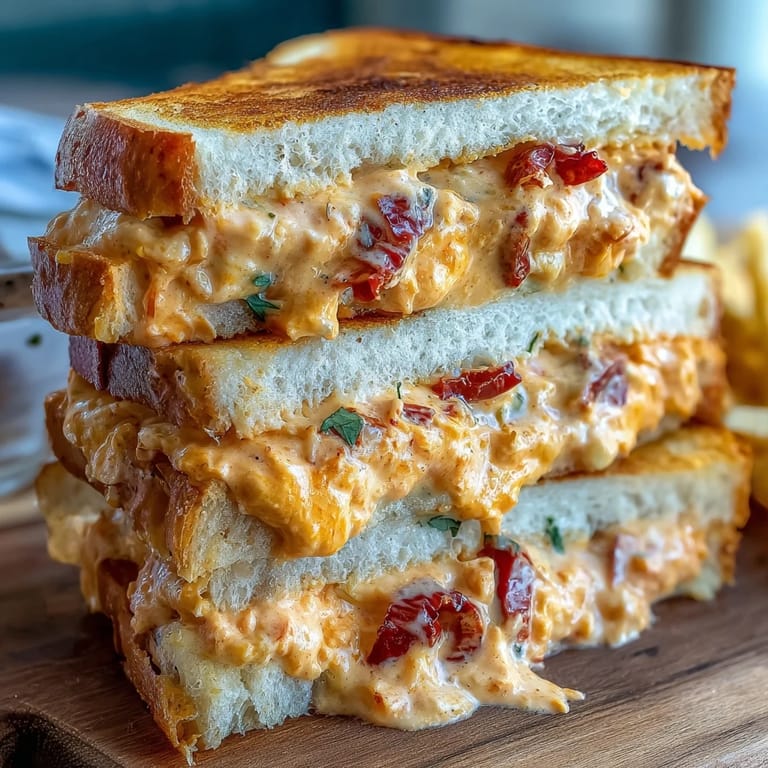
I made these for my book club last spring, and something magical happened when everyone bit into that first sandwich. The way the sharp cheddar played against the sweetness of the pimentos, with that subtle heat creeping in at the end, started a conversation that lasted through our entire discussion. My friend Sarah asked if she could freeze some for later, and I realized right then that this wasn't just about feeding people, it was about creating little moments of comfort in sandwich form.
Ingredients
- Sharp cheddar cheese, freshly grated: Freshly grating your own cheese makes an enormous difference in texture and taste, trust me on this one, as pre-shredded cheese contains anti-caking agents that interfere with the smooth consistency you're after.
- Cream cheese, softened: Make sure to leave it on the counter for at least thirty minutes so it blends seamlessly with the mayo and doesn't create lumpy pockets.
- Mayonnaise: Don't skimp on quality here because it's what gives the mixture its silky richness.
- Jarred diced pimentos, drained: These little red peppers are the soul of the sandwich, sweet and slightly tangy, so drain them well to prevent your filling from becoming watery.
- Garlic powder, onion powder, cayenne pepper: These seasonings sneak in subtle depth without making the cheese mixture spicy or overpowering.
- Kosher salt and freshly ground black pepper: These enhance every other flavor without announcing themselves.
- Thin white sandwich bread: The delicate crumb of good quality white bread is essential because it won't overpower the filling and cuts cleanly into those perfect finger sandwich shapes.
- Unsalted butter, softened: A thin butter layer is your insurance policy against soggy bread, especially if you're making these a few hours ahead.
Tired of Takeout? 🥡
Get 10 meals you can make faster than delivery arrives. Seriously.
One email. No spam. Unsubscribe anytime.
Instructions
- Blend your cheese base:
- Combine the cheddar, cream cheese, and mayo in a bowl and beat them together until the mixture looks smooth and spreadable, like a cloud that's just dense enough to hold its shape. This is the moment where a hand mixer saves you some arm strength, but vigorous stirring with a sturdy spoon works perfectly fine too.
- Fold in the seasonings:
- Stir in the pimentos, garlic powder, onion powder, cayenne (if you're using it), salt, and pepper, making sure everything is evenly distributed throughout. The mixture should smell bright and slightly savory at this point, with little flecks of red throughout.
- Prepare your bread:
- Lay out all your bread slices and if you want to use butter, spread a thin layer on one side of each slice to create a protective barrier against moisture. This step feels fussy but it absolutely prevents the bread from getting soggy if you're making these ahead.
- Assemble the sandwiches:
- Spread about two tablespoons of the pimento cheese on half of your bread slices, then top with the remaining slices, butter-side down if you buttered them. Press down gently so the filling spreads to the edges but doesn't squish out.
- Cut and arrange:
- Using a sharp serrated knife, trim off the crusts first, then cut each sandwich into thirds or quarters depending on how dainty you want them. The serrated knife is crucial here because it won't compress the bread the way a straight knife would.
- Chill before serving:
- Arrange your finger sandwiches on a platter, cover them with a barely damp paper towel to keep them moist without making them soggy, and refrigerate for up to four hours. This chilling time also lets the flavors settle and the filling firm up slightly, making them easier to eat without falling apart.
 Save
Save I'll never forget the look on my mother-in-law's face when she realized the pimento cheese filling didn't come from a store jar, that I had actually made it myself. She asked me to write down the recipe on a card right there in her kitchen, and I've since learned that's when you know something has truly resonated with people, when they want to recreate it at their own table. These sandwiches have become my secret weapon for making people feel genuinely welcomed and cared for.
The Secret to Creamy Texture
The real magic happens when you let your cream cheese come completely to room temperature before mixing, because cold cream cheese fights against blending smoothly and leaves you with an uneven consistency. I learned this the hard way when I tried rushing the process once and ended up with little pockets of cream cheese in my filling that nobody wanted to bite into. Now I always set my cream cheese out when I start preparing everything else, giving it the time it needs to soften naturally.
Why Thin Bread Makes All the Difference
Those delicate tea sandwich loaves you find at the bakery counter aren't just for show, they're actually necessary because thick bread overpowers the filling and makes the sandwiches feel heavy instead of delicate. The whole point of a finger sandwich is that it should feel like a small, perfect bite that doesn't overwhelm your palate, especially when you're standing around at a party with a drink in your other hand. One time I tried using regular sandwich bread that was too dense and I watched people put them down after one bite, reaching instead for the prettier little ones I'd made with proper thin bread.
Timing and Make-Ahead Magic
These sandwiches actually improve if you make them a few hours ahead because the flavors marry together and the bread absorbs just enough moisture from the filling to become tender without becoming soggy. I discovered this when I made a batch the night before a brunch and they were somehow better than the ones I'd just assembled. The key is storing them properly under that barely damp paper towel and keeping them in the coldest part of your refrigerator.
- Make the pimento cheese mixture up to a full day ahead and store it in an airtight container, then assemble the sandwiches up to four hours before serving.
- If you need to make them even further ahead, the filling freezes beautifully for up to two weeks, so you can pull it out and assemble fresh sandwiches whenever you need them.
- Never leave these at room temperature for more than two hours because the dairy content means they're not safe to sit out longer than that.
 Save
Save Every time I make these, I'm reminded that the most impressive dishes are often the simplest ones, the ones that celebrate quality ingredients and don't try too hard. There's something deeply satisfying about handing someone a little sandwich that makes them close their eyes for a moment and just enjoy the taste.
Recipe FAQ
- → What type of cheese is used for the filling?
A combination of sharp cheddar and cream cheese provides a creamy and flavorful base for the filling.
- → Can I make these sandwiches ahead of time?
Yes, they can be assembled up to a day in advance and stored tightly wrapped in the refrigerator to maintain freshness.
- → How do I prevent the bread from getting soggy?
Lightly spreading softened unsalted butter on the bread slices before adding the cheese mixture helps prevent sogginess.
- → Is there a spicy element in the cheese mixture?
A small amount of cayenne pepper can be added for mild heat, but it is optional based on preference.
- → What is the best way to cut these sandwiches for serving?
Trim the crusts off and cut each sandwich into thirds or quarters to create elegant finger-sized portions.
- → What are good beverage pairings for these sandwiches?
They pair wonderfully with sweet tea, bourbon cocktails, or a crisp white wine.