 Save
Save The first time I attempted rainbow Jello cups, a faint giggle echoed from the hallway: my niece, peeking into the kitchen, eyes wide with anticipation. The sunlight danced across the counter, highlighting the array of brightly colored boxes I’d lined up like paint samples. Every flavor promised a different scent—fruity, sugary, almost cartoonish in their intensity. I remember pausing, checking my watch, wondering if I’d manage to layer everything perfectly before my late-afternoon guests arrived. Jello is forgiving but demandingly patient, especially with children circling impatiently for a taste.
One Saturday, my sister stopped by with her twins—armed with tiny spoons and boundless glee. We spent the afternoon creating an assembly line, stirring Jello, pouring careful layers, and counting down to the next chill interval. The kitchen filled with laughter and occasional splashes on the counter as one cup nearly tumbled over. By the time the sprinkles went on top, their faces gleamed brighter than the dessert itself.
Ingredients
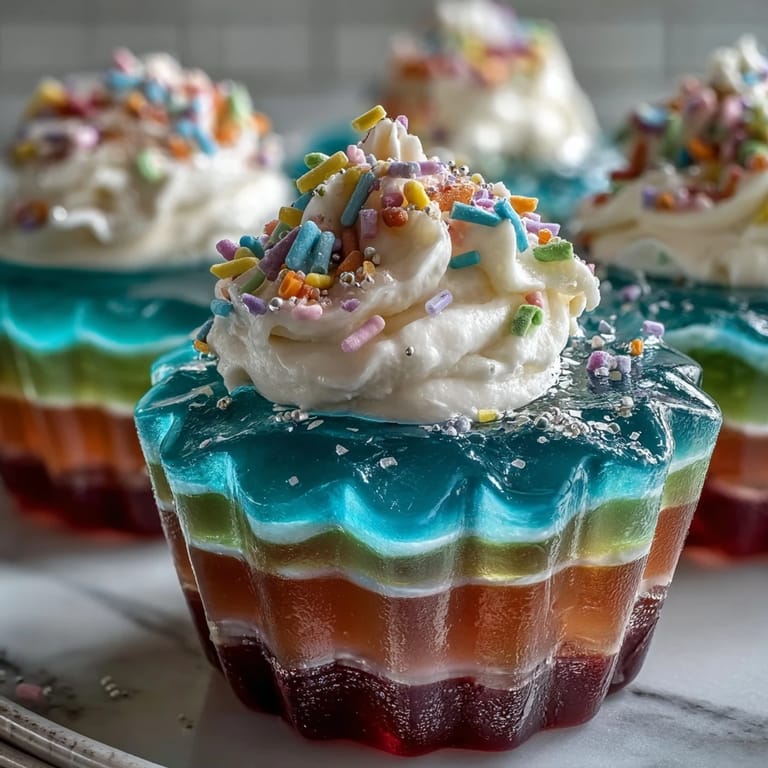
- Strawberry Jello: This brings the final dramatic pop of red to your rainbow. Stir it slowly—undissolved powder can make the layer uneven.
- Orange Jello: A sweet, citrusy layer that always sets well. Test the temperature of your water for perfect clarity.
- Lemon Jello: The yellow is brilliant, especially if you pour gently so it doesn’t cloud the layers beneath.
- Lime Jello: Green adds zing and balances the progression. Don’t rush: patience keeps the stripes crisp.
- Berry Blue Jello: This vibrant blue stands out and, if chilled thoroughly, forms a striking contrast with both green and purple.
- Grape Jello: The deep purple lays down your foundation. Stir well so it’s free from white streaks.
- Boiling water: Always measure out exactly one cup per flavor; too much and the layer won’t set quickly.
- Cold water: Chilling each layer is key, so have cold water ready for speed and smoothness.
- Whipped cream or topping: For a billowy crown—make sure it's chilled for easy piping or dolloping.
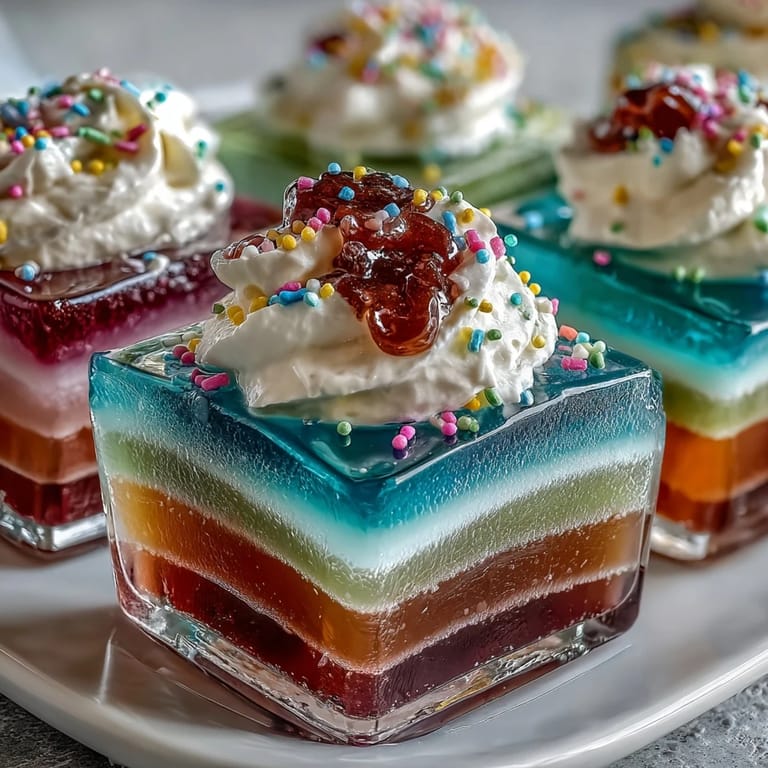
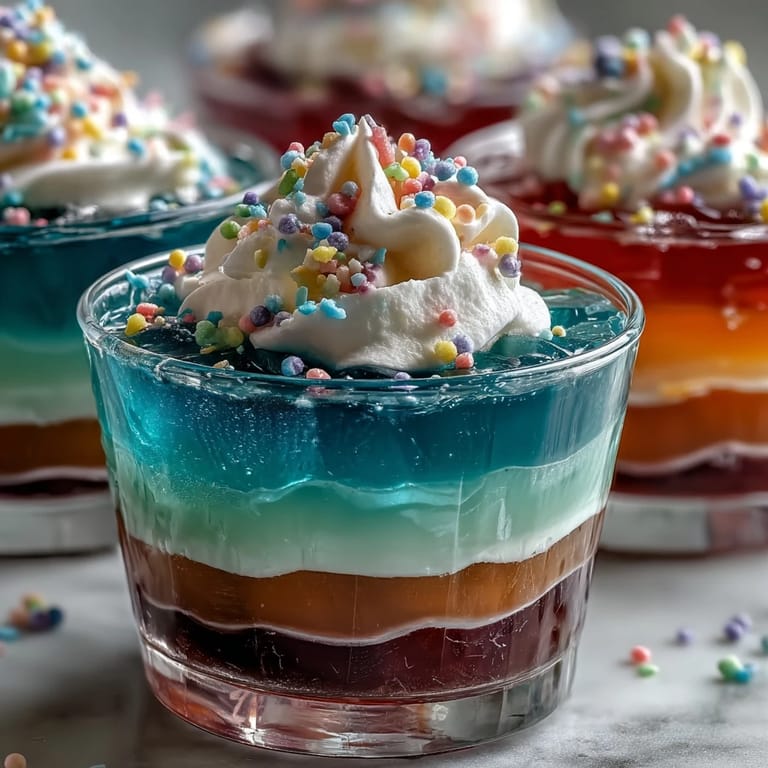
- Rainbow sprinkles: Not just decoration—they make each serving truly festive and fun.
Tired of Takeout? 🥡
Get 10 meals you can make faster than delivery arrives. Seriously.
One email. No spam. Unsubscribe anytime.
Instructions
- Mix the first Jello:
- Start with grape—combine one box with a cup of boiling water, stirring until every granule disappears. Pour in a cup of cold water, watch the color bloom, and divide the mixture between the eight cups.
- Set up the first layer:
- Pour about two tablespoons into each cup for a neat base. Refrigerate for 30–40 minutes; check by gently tapping, making sure it's firm before you layer again.
- Layer up the colors:
- Repeat with blue, green, yellow, orange, and strawberry, always mixing each flavor separately and letting each layer chill properly. Don’t forget to rinse your mixing bowl between colors to keep layers pure.
- Top it off:
- Once the final red layer is set, add a dollop of whipped cream; if you want, sprinkle on rainbow bits for a playful finish. Serve chilled and let everyone marvel at your edible artwork.
 Save
Save Watching the cups disappear at a birthday party, I realized they’d become more than a dessert—kids compared their stripes, adults reminisced over old-school gelatin treats, and for a moment laughter overruled the chaos. It was the kind of food that managed to turn a table into a celebration.
Getting Colorful Without Stains
Set everything up before you start—cover counters with a towel or parchment, and keep napkins handy. Even with careful pouring, little drips will happen, so don’t wear your favorite shirt. With every layer, there’s a new opportunity for a splash, so I always keep a damp cloth close by. Cleaning as you go makes the final reveal all the more satisfying.
Making It Dairy-Free and Allergy Friendly
Coconut whipped cream is surprisingly light and easy to use, creating that classic topping even for dairy-sensitive guests. Check labels on sprinkles—some contain gluten or artificial dyes. Swapping out one flavor for another can keep everyone happy; lemon and lime are naturally vegan, and there are plant-based Jello alternatives too.
Layering Success: How to Nail Every Stripe
Don't let impatience ruin your layers. Let each flavor set stiffly before adding another, and avoid touching the cups as the Jello chills, or you'll get wavy lines. Try pouring slowly against the side of the cup—it gives you sharper edges and more definition.
- Chilling longer means cleaner stripes.
- Keep cups spaced apart for even cooling.
- Use a small spoon to layer gently; it prevents splashing.
 Save
Save Making rainbow Jello cups is pure celebration on a plate. Seeing everyone’s faces light up when you hand them a cup is worth every bit of patience.
Recipe FAQ
- → How do I create distinct rainbow layers?
Allow each Jello layer to set fully before adding the next, chilling for 30–40 minutes between layers. Pour gently for clean stripes.
- → Can I use different flavors or colors?
Yes, customize the Jello colors and flavors to suit your preference or party theme for a unique look and taste.
- → Is there a dairy-free topping option?
For dairy-free needs, use coconut whipped cream or another non-dairy topping instead of regular whipped cream.
- → How far ahead can I make these cups?
You can prepare these cups a day ahead and keep chilled in the refrigerator until ready to serve to ensure freshness.
- → What tools do I need for preparation?
You'll need 8 clear cups, mixing bowls, a whisk or spoon, measuring cups, and access to a refrigerator for proper chilling.
- → Are there options for a lighter version?
Use sugar-free Jello and a light whipped topping for a lower calorie variant without sacrificing color or flavor.