 Save
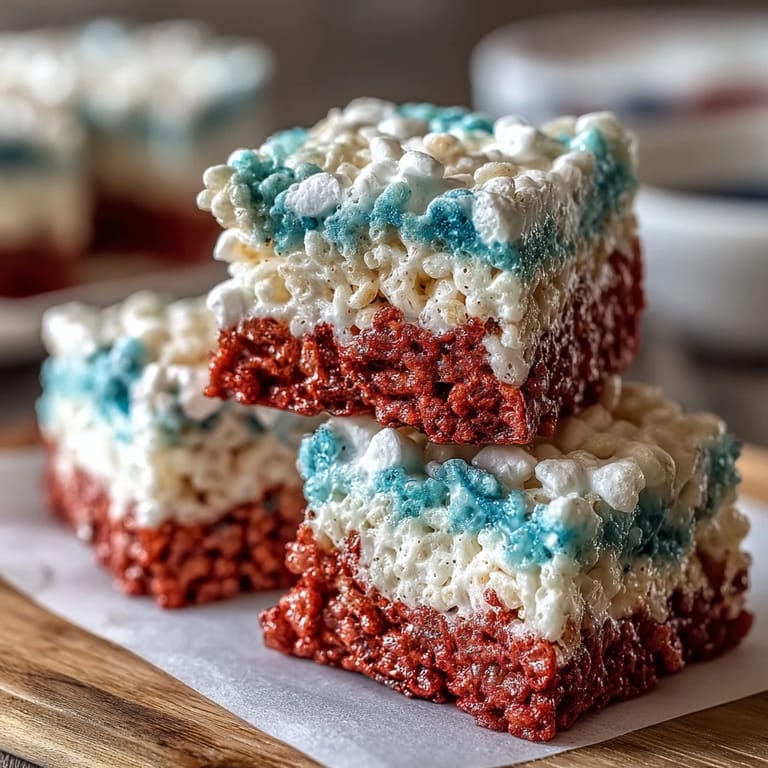
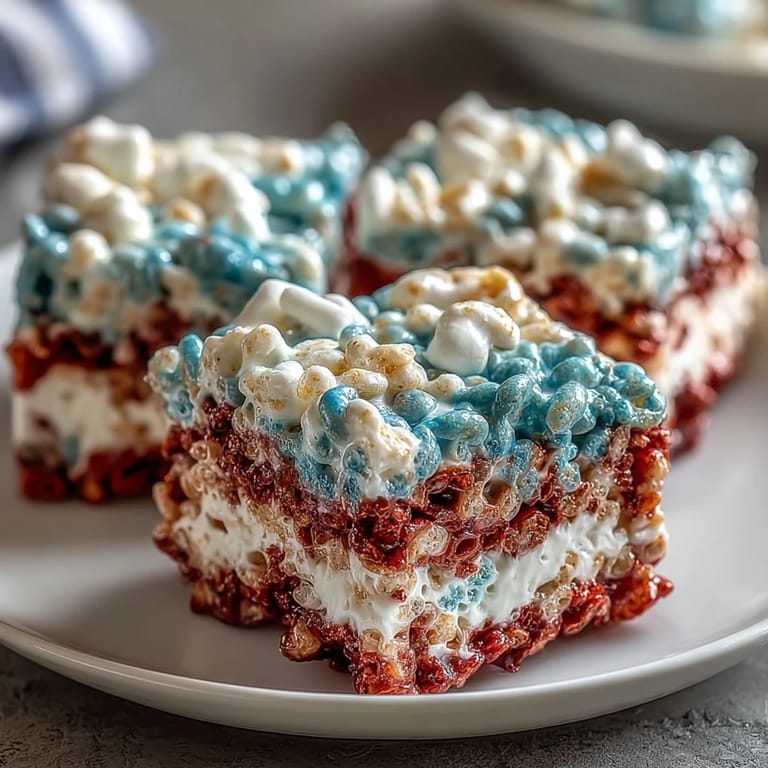
Save My neighbor knocked on the door that July morning with a stack of napkins and a grin, asking if I could whip up something patriotic for the block party. I'd never made layered Rice Krispies treats before, but standing in my kitchen with the red, white, and blue food coloring bottles lined up like tiny soldiers, something clicked—this was going to be fun. The marshmallows started melting, and within minutes the whole place smelled like buttered sweetness and summer plans.
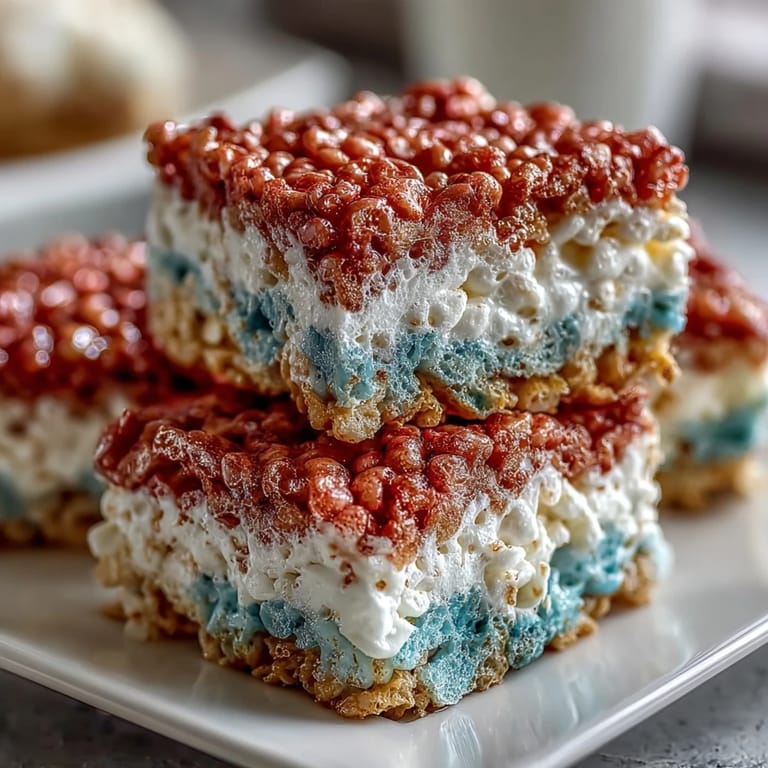
That Fourth of July, I brought these treats to the neighborhood gathering, and they vanished before the fireworks even started. A kid came back for thirds and told me they tasted like "America's birthday," which might be the best compliment any dessert has ever received in my kitchen.
Ingredients
- Rice Krispies cereal: You need exactly 6 cups—I learned the hard way that eyeballing it leads to layers that are either too thick or too thin to press evenly.
- Mini marshmallows: A 10 oz bag gives you enough to divide into three equal portions without any sad leftover bits.
- Unsalted butter: The 3 tablespoons total lets you control the sweetness; I divide it one per layer so each one melts cleanly without burning.
- Vanilla extract: Just a half teaspoon goes into the white layer for a subtle flavor that makes people ask what that hint of something is.
- Red and blue gel food coloring: Gel is non-negotiable here—liquid coloring turns everything into a runny mess, and I found that out the expensive way.
- Red, white, and blue sprinkles: Optional, but they catch the light and make the whole thing feel intentional rather than accidental.
Tired of Takeout? 🥡
Get 10 meals you can make faster than delivery arrives. Seriously.
One email. No spam. Unsubscribe anytime.
Instructions
- Prep your pan like you mean it:
- Line a 9x9-inch baking pan with parchment paper and give it a light grease so your finished treats come out without sticking or tearing. This step takes thirty seconds but saves you from a sticky disaster later.
- Portion everything before you start melting:
- Divide your marshmallows and butter into three equal portions now—about 3 1/3 cups marshmallows and 1 tablespoon butter each. Working this way keeps you from guessing mid-layer when things are hot and you're tired.
- Build the red layer with confidence:
- Melt 1 tablespoon butter in your saucepan over low heat, add your first portion of marshmallows, and stir until they're completely smooth and glossy. Drop in a few drops of red gel coloring—seriously, start small because it's intense—and mix until you get that perfect patriotic red, then fold in 2 cups of cereal until everything's coated evenly.
- Press and smooth the first layer:
- Pour the red mixture into your pan and use a lightly greased spatula or your greased hands to press it into a thin, even layer. Take your time here because a bumpy base makes stacking the other layers trickier.
- Clean your pan between colors:
- Wipe out the saucepan with a clean towel or quick rinse before making the white layer—any red crumbs will muddy your white, and nobody wants that.
- Make the white layer with vanilla:
- Melt 1 tablespoon butter again, add the second portion of marshmallows, and once they're smooth, stir in the vanilla extract for a subtle twist. Mix in 2 cups of cereal and gently press it over the red layer, being careful not to squish everything together.
- Finish with the blue layer:
- Repeat the wiping process, melt your last tablespoon of butter with the remaining marshmallows, add blue gel coloring a drop at a time, then fold in the last 2 cups of cereal. Press gently but firmly over the white layer—this one goes on top, so a little extra pressure ensures it all stays together.
- Sprinkle while warm if you're feeling fancy:
- If you're using the optional sprinkles, scatter them on top while the blue layer is still slightly warm so they stick. They're not necessary, but they do make it look like you tried.
- Let it set completely before cutting:
- Walk away and give these a full hour to cool and firm up at room temperature—no shortcuts here or you'll end up with squares that fall apart when you pick them up. Once set, lift the whole slab out using the parchment, lay it on a cutting board, and slice into sixteen squares with a sharp, clean knife.
 Save
Save There's something magical about food that tells a story just by looking at it, and these treats do exactly that. Every layer represents something, and when you cut through them, you're serving up a slice of American celebration.
Why Gel Coloring Makes All the Difference
The first time I made these, I grabbed liquid food coloring from the pantry because it was there, and within minutes I was watching my beautiful red layer turn into a sticky, weeping disaster. The moisture from liquid coloring breaks down the structure that holds everything together, and by the time you fold in the cereal, you're basically making marshmallow soup. Gel coloring is concentrated and water-free, so it colors beautifully without ruining the chemistry of the treat—a lesson I only needed to learn once.
The Art of Pressing Without Squishing
Pressure is the enemy of layers, so finding that sweet spot between "gently placed" and "firmly secured" takes a gentle touch and a greased spatula. I learned to use the heel of my hand and work from the center outward, which distributes the pressure evenly and keeps the layers from bonding into one giant blob. Your greasing tools—whether it's your hands or a spatula—should be just barely slick, not dripping, or you'll end up with an oily finish that feels weird on your tongue.
Storage, Serving, and Making Them Last
These treats stay fresh in an airtight container for up to three days, though honestly they rarely last that long once people find them. I've learned to stack them with parchment between the layers so they don't stick together, and keeping them in a cool spot away from direct sunlight prevents the colors from fading.
- Cut them into clean squares with a sharp knife dipped in water between each cut for neat edges.
- You can make these a day ahead and they'll actually be better—the layers set more firmly overnight.
- If you're taking them to a party, pack them in a single layer in a container with a tight lid so they don't get jostled around.
 Save
Save These patriotic treats became my go-to because they're foolproof and they make people genuinely happy. Make them once and you'll understand why everyone asks for the recipe.
Recipe FAQ
- → What ingredients give the colors in these treats?
Red and blue gel food coloring create the vibrant layers, while the white layer is flavored with vanilla extract for a balanced look and taste.
- → How do I prevent the mixture from sticking when pressing layers?
Lightly greasing your hands or using a spatula helps to press the layers evenly without sticking, ensuring clean, smooth surfaces.
- → Can these layered squares be made ahead and stored?
Yes, they can be stored in an airtight container for up to three days, keeping their chewy texture and flavors intact.
- → Is there a preferred coloring type for best results?
Gel food coloring is recommended since it provides vibrant shades without adding excess moisture, unlike liquid colors.
- → What is the best way to cut the squares after cooling?
After at least one hour of cooling and setting, lift the layered block from the pan and slice evenly into squares using a sharp knife.